New York City – “The Big Apple” – it’s where I got my start in the video business over thirty-five years ago. A need to shoot two interviews and capture some stills for a current legacy video project brought me back to NYC in late March. And though the outside temperature was bitingly cold, the bagels were hot and the memories were warm.
Before leaving for the east, I had a decision to make: How was I going to acquire the stills? Normally, I prefer to scan images in the office using one of my flatbed scanners. This gives me the greatest control over quality and image size and allows me to name the scanned files as I go, in whatever way helps to best organize them. However, old photos, albums and papers can often be too fragile or unique to ship. In that case, scanning and/or shooting them at the client’s location becomes necessary.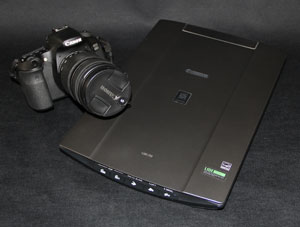 My two favorite tools for this kind of work are my Canon LIDE 210 scanner and my Canon 60D DSLR.
The LIDE 210 is great for traveling. At 9.9 inches wide, 14.4 inches long and 1.6 inches deep It’s barely wider and longer than a piece of legal paper – and it fits easily into my carry-on luggage. The scanner doesn’t need a power adapter; one USB cable connects the LIDE to my laptop and provides power for the scanner. Compared to my larger office scanners, the LIDE is a little limited when it comes to the range of ppi (pixels per inch) available, but, overall, I find it a great scanner to take on the road.
Of course, when using a flatbed scanner, the material being scanned needs to be, well, flat. And for items that aren’t easily scanned or scannable at all (framed pictures or paintings, for example) my Canon 60D fits the bill. On this trip, I knew I’d be encountering an array of stills in various forms (loose snapshots, photos from books, framed images and old, crumbling scrapbooks). Plus, the time I’d have to sort through the available images, decide what to capture and then do it, would be limited to one afternoon. Given these circumstances, I decided my DSLR would give me both the flexibility I needed and the ability to work quickly. So I brought the 60D with me and left the scanner at home.
In the end, that was the right decision. I captured far more photos using the DSLR in the time I had than I could have with the scanner. Of course, the photos will need a little more Photoshop work than they would if they’d been scanned. And I couldn’t name the files as I went. I just made written notes as I shot, listing the order and subjects of the images. I’ll give them appropriate file names when I Photoshop them.
If you’re in a situation where only a DSLR will do for snagging the images that will grace your client’s video biography, here are some tips:
Keep the camera as parallel to the image as you can. This keeps the image as flat as possible and saves you some Photoshop work later. It also helps keep all of the image in focus. I was able to shoot many images by laying them on a table and shooting down on them, although some needed to be leaned against a vertical surface.
Be careful when using flash. Direct flash can create hot spots or even wash out the image being shot. Rely on ambient light if you can, or soften the flash by bouncing it.
Watch out for reflections. This can be difficult to do when shooting framed photos covered by glass. You can minimize or eliminate reflections by placing the image on a dark cloth, preferably black, and leaning the frame against a vertical surface. The idea is to angle the glass and your camera so that the only reflection the glass picks up is the black cloth.
Check focus. After shooting an image, display it on your camera’s monitor and zoom in to check on the fine details. Today’s small camera monitors can fool you into thinking a shot is sharp when it isn’t.
Take notes. Make a list of the shots you take as you work. You don’t want to be left scratching your head while guessing who is who or what is what after you get back home.
Back up your files. If you have a laptop available, copy the files from your camera’s card to it. For safety’s sake, it never hurts to have your files stored in a couple of places.
Finally, keep your eyes open. You may find something worth shooting at your client’s location that you hadn’t expected. For example, as I was finishing up for the day, I saw three portraits of my client’s children hanging in a hallway. It took me only a couple of minutes to snap those and I know they’ll make a nice addition to the video.