My first still photo camera was cheap. REAL cheap. Pretty close to being a toy camera, actually. I plucked it off a metal rack in a five-and-dime store sometime in the mid 1960s, when I was maybe 9 or 10 years old, and I’m sure I only shelled out a buck or two for it. Of course, that was big money to me back then! As far as I can remember, it was black plastic, with a fixed lens. It took rolls of film; no cartridges for this baby. Once loaded, I had to carefully turn the knob attached to the take up reel until the number for the next shot appeared in the center of the translucent red circle on the camera’s back. Then, it was just point and shoot until I used up 12 exposures – black and white, of course.
After dropping off the film at the local drugstore, it was nail-biting time; the anticipation building until I returned to the pharmacy, handed over my claim check, paid for the prints, and peeled open the top flap of the envelope to see if any of my snapshots had developed as hoped.
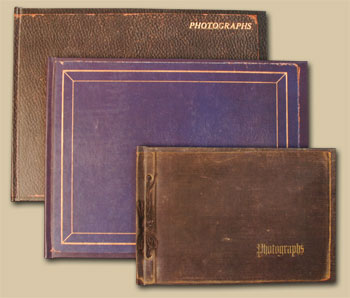
I actually fared pretty well with that little camera and wound up with a goodly number of photos worth saving. The next challenge became what to do with all those square prints with the white, serrated borders. The answer, put ’em in an album. Now, when I was a kid, I first stored my photos in albums with heavy paper pages – sliding each print into little white paper corners pasted to the page. Mounting pictures back then was a laborious process, and not much different from the way families had been storing their photographs since the late 1800s.
 And it’s those old albums that can really pose problems. If you have one or more of them in your family, you know what I mean. The black or gray paper pages are far from archival and full of chemicals and acids that may have discolored the photos stored on them. By now, the pages are probably pretty brittle. The glue holding the photos or corners into place may have completely dried out and the pictures let loose.
I work with albums like these occasionally in my video biography work and I always handle them gingerly. Wearing cotton gloves, I slowly and carefully untie the thread holding the pages in place, and then tenderly convey the album, page by page, to a flat bed scanner, doing my best to prevent the edges of each leaf from flaking. I always breathe a sigh of relief after I’ve successfully reconstructed each precious book.
The problem is, the conditions of these old albums isn’t getting any better. What can you do to preserve your precious family images and protect them from the ravages of time?
The first step I suggest is that you digitize the photos. Several years ago, a client approached Family Legacy Video with three old family albums dating from the late 1800s through the end of WWII. He was hoping we could scan the pages and the photos and reconstruct the books somehow. Using a large format scanner, we scanned each page of the albums, including the front and back covers, as well as each photo (including any notes on the back of the photos), at high resolution. We used the scanned pages and covers to recreate the albums as printed books, and provided the client with all the digital files as well. He and his family were thrilled with the results. Now albums that had been sitting in a closet for years are in a form that can be enjoyed by all members of the client’s family.
Even though digitization is a wonderful thing, you still want to take steps to keep the original albums from degrading any further. According to Certified Archives Records Manager Melissa Barker, the best way to do this is to put a sheet of archival tissue paper between each page of the album. This creates a barrier between the photographs and the adjacent black paper pages; if photographs come off any remaining glue will not touch the other photographs on the adjacent page.
Store loose photos that have fallen out of the album in archival sleeves and keep them with the album. Place the entire album, along with the loose photos, in an archival box. The box should fit the album as snugly as possible. If you need to fill up some space to keep the album from shifting position, simply wad up some of the archival tissue paper and slip it between the album and the sides of the box. Store the box in a cool, dark, and dry place. Never store documents, photographs, or artifacts in an attic, basement, or where it is humid or there is direct sunlight.
Looking for a source for archival photo storage supplies? If your local photo store doesn’t carry them, you’ll find any number of outfits online.
These old family albums, and the images they contain, are wonderful keepsakes. Through a combination of digitization and careful storage, you can make sure your family photographic treasures are around for generations to come.