Choosing your video biography playback options.

It was the mid-1960s. I was nine years old, and about to dig into a hefty slice of chocolate cake at my cousin’s birthday party.

“Act natural!”

I looked up, and for a split second I saw my uncle balancing a Super 8 movie camera attached to a metal bar bristling with lights. He flipped a switch, and suddenly it seemed as if I was looking directly into the sun. I waved and smiled, hoping against hope that the heat radiating from that nuclear glow wouldn’t melt my scoop of mint-chocolate chip ice cream. After a few seconds, the ordeal ended. As red and purple spots danced in front of my eyes, my uncle moved off to find other victims.

For years, the only way to watch my painful attempt to “act natural” was to set up a movie screen and projector, thread the film over the sprockets, turn off the lights, fire up the projector and roll the film.

That’s all changed now, of course. The miracle that was VHS (and, for a while, Betamax) videotape has given way to a plethora of video formats. Great for the consumer, but an ongoing challenge for those of us who create and distribute video, including video biographies, and who want to meet our clients’ needs for convenient viewing options and secure storage.

Most of the work that goes into creating a legacy video is the work that’s needed to, well, create the video. Once the program is finished, Family Legacy Video® can deliver it in any number of ways. Here are some of the most popular options currently available:

DVD/Blu-ray Discs
There are some who say DVD and Blu-ray discs will be the next video technology to fade away. While disc-based playback (including audio CDs) competes with many other playback options these days, it’s not about to go extinct anytime soon. Here’s what a representative from a company named Primera (admittedly a business that sells discs and disc duplicators) recently said on the subject: Our main customers are recording studios, video production houses, churches and schools, government and military – all of whom still use lots of discs to distribute and archive content. For example, wedding photos and videos are almost always still put onto discs. Brides don’t seem to trust flash drives or the cloud for such important content! Also, bands still sell Family Legacy Videos come on discs and flash drives
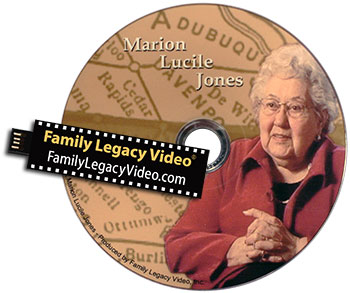
discs at gigs. It’s really the only way to sell content on-site. Sure, they’ll RIP the disc to their iPhone when they get home. But at least the band got the sale, which they likely wouldn’t have if they simply said, “download us online when you get home.”

DVDs (for standard video) and Blu-rays (for high definition video) offer long shelf life (as long as you use high-quality discs and don’t abuse them). Custom navigation (menus that allow you to play the entire video biography or select which chapters you’d like view) is a terrific feature. Plus, Family Legacy Video® creates beautiful DVD/Blu-ray artwork. So from the legacy video itself to the final package, clients receive a unique and custom video keepsake.

That being said, you need a standalone player connected to a TV or a computer with DVD and/or Blu-ray capability to play the discs. And, like anything physical, they can be lost or damaged.

Video Files on External Drives
I recently worked with a client who viewed video only on a Mac laptop that didn’t have a disc drive. For this client, the choice was video files on an external drive, in this case a USB flash drive. The storage capacity of flash drives has skyrocketed in recent years, so finding one to fit even a high-definition video biography file is not an issue. What has been a concern for me is the packaging available for flash drives. While the quality of the video is paramount, I still want to present the video in a well-designed physical wrapper. Fortunately, I have found a provider of high-end custom-printed USB drives and boxes. While we can’t fit nearly as much printed information on the face of a flash drive as we can on the insert for a DVD case, a personal flash drive can now boast a very elegant appearance.

An upside to a flash drive is the ability to easily copy the files to other computers and drives. A downside is that you can erase a flash drive. So be careful! I recommend making additional copies for safe keeping.

Online Video Services
If the audience for your video is spread over the U.S. or the globe, you might want to consider posting your video biography to a service like Vimeo. You will be charged annually for hosting. But, you can create a private account that will keep your legacy video away from the prying eyes of the public. You’ll have a link you can share only with those who you want to view the video. This could also be a great option if you want to be sure that younger generations of your family, addicted as they are to their mobile devices, will be able to watch you tell your life stories for years to come. Family Legacy Video® can certainly help you set up a private Vimeo account and upload your legacy video.

One caution: Don’t make an online service the only repository for your video biography. No matter how secure they’re advertised to be, servers can crash or get hacked and companies can go out of business. Even if most of the family will be accessing your video biography on the web, be sure to squirrel away some physical copies (preferably a combination of discs and external drives) in a secure place, just for safety’s sake. And don’t forget to make sure someone continues to pay for the hosting – you don’t want your account – and your legacy video – deleted!

The bottom line: You have lots of options for viewing and storing your legacy video these days. Family Legacy Video® will be happy to deliver those that work best for you.

Family Legacy Video® gives King Tet’s Record Rescuers two thumbs up.

About five years ago I purchased a USB turntable in order to transfer some of my wife’s cherished childhood records to CD. One of those records was an old 78 RPM recording from the early 1900s. The other was a 45 RPM disc from the 1950s. Was I able to transfer the recordings? Well, yes. But they were noisy as heck. Quite honestly, they were unlistenable. And no matter what I tried with the software I had available, I couldn’t clean them up.

Fast forward to this past Christmas. I vowed to try again. But I’m a video guy, so I thought this time I’d search for a company experienced in vinyl to digital audio transfers. The Internet led me to Eric Van der Wyk. Eric is based in San Diego and runs a variety of companies under the King Tet Productions umbrella. Three of those companies focus on transferring audio from old media to audio cds: Record Rescuers, Custom Audio CDs, and ReelToReelToCD.com. His prices were pretty reasonable, so I decided to give him a try.

A week after trusting Halina’s records to the mail, I got them back, along with a CD. With fingers firmly crossed, I popped the disc into my CD player. To my amazement, the songs that emanated from my speakers were crystal-clear and noise-free. At that moment I decided that Erik would be my “go-to guy” for any other jobs like this.

So if you’d like to resurrect your old records, give Record Rescuers a try. I think you’ll be glad you did.

Posted in Uncategorized | Comments Off on Family Legacy Video® gives King Tet’s Record Rescuers two thumbs up.

Another wonderful video biography testimonial.

I just received this testimonial from my most recent video biography client, who lives in Hawaii:

“Steve, thank you for a wonderful job on my video biography. I was impressed with the professionalism of you and your crew. I especially liked the way you supplemented the photos and other visuals I gave you with archival photos and films that really helped illustrate my personal and business stories. I’ll be proud to share my legacy video with my family and friends – and to recommend Family Legacy Video® to anyone wanting to preserve, celebrate and share his/her life stories. Mahalo!”

Posted in Uncategorized | Comments Off on Another wonderful video biography testimonial.

Acquiring images on the road.

New York City – “The Big Apple” – it’s where I got my start in the video business over thirty-five years ago. A need to shoot two interviews and capture some stills for a current legacy video project brought me back to NYC in late March. And though the outside temperature was bitingly cold, the bagels were hot and the memories were warm.

Before leaving for the east, I had a decision to make: How was I going to acquire the stills? Normally, I prefer to scan images in the office using one of my flatbed scanners. This gives me the greatest control over quality and image size and allows me to name the scanned files as I go, in whatever way helps to best organize them. However, old photos, albums and papers can often be too fragile or unique to ship. In that case, scanning and/or shooting them at the client’s location becomes necessary.DSLR-Scanner-300x227 My two favorite tools for this kind of work are my Canon LIDE 210 scanner and my Canon 60D DSLR.

The LIDE 210 is great for traveling. At 9.9 inches wide, 14.4 inches long and 1.6 inches deep It’s barely wider and longer than a piece of legal paper – and it fits easily into my carry-on luggage. The scanner doesn’t need a power adapter; one USB cable connects the LIDE to my laptop and provides power for the scanner. Compared to my larger office scanners, the LIDE is a little limited when it comes to the range of ppi (pixels per inch) available, but, overall, I find it a great scanner to take on the road.

Of course, when using a flatbed scanner, the material being scanned needs to be, well, flat. And for items that aren’t easily scanned or scannable at all (framed pictures or paintings, for example) my Canon 60D fits the bill. On this trip, I knew I’d be encountering an array of stills in various forms (loose snapshots, photos from books, framed images and old, crumbling scrapbooks). Plus, the time I’d have to sort through the available images, decide what to capture and then do it, would be limited to one afternoon. Given these circumstances, I decided my DSLR would give me both the flexibility I needed and the ability to work quickly. So I brought the 60D with me and left the scanner at home.

In the end, that was the right decision. I captured far more photos using the DSLR in the time I had than I could have with the scanner. Of course, the photos will need a little more Photoshop work than they would if they’d been scanned. And I couldn’t name the files as I went. I just made written notes as I shot, listing the order and subjects of the images. I’ll give them appropriate file names when I Photoshop them.

If you’re in a situation where only a DSLR will do for snagging the images that will grace your client’s video biography, here are some tips:

Keep the camera as parallel to the image as you can. This keeps the image as flat as possible and saves you some Photoshop work later. It also helps keep all of the image in focus. I was able to shoot many images by laying them on a table and shooting down on them, although some needed to be leaned against a vertical surface.

Be careful when using flash. Direct flash can create hot spots or even wash out the image being shot. Rely on ambient light if you can, or soften the flash by bouncing it.

Watch out for reflections. This can be difficult to do when shooting framed photos covered by glass. You can minimize or eliminate reflections by placing the image on a dark cloth, preferably black, and leaning the frame against a vertical surface. The idea is to angle the glass and your camera so that the only reflection the glass picks up is the black cloth.

Check focus. After shooting an image, display it on your camera’s monitor and zoom in to check on the fine details. Today’s small camera monitors can fool you into thinking a shot is sharp when it isn’t.

Take notes. Make a list of the shots you take as you work. You don’t want to be left scratching your head while guessing who is who or what is what after you get back home.

Back up your files. If you have a laptop available, copy the files from your camera’s card to it. For safety’s sake, it never hurts to have your files stored in a couple of places.

Finally, keep your eyes open. You may find something worth shooting at your client’s location that you hadn’t expected. For example, as I was finishing up for the day, I saw three portraits of my client’s children hanging in a hallway. It took me only a couple of minutes to snap those and I know they’ll make a nice addition to the video.

Posted in Uncategorized | Comments Off on Acquiring images on the road.